April 28

0 comments

How To Improve Your Balance Skill For Handstands

By Yasuko

April 28, 2022

Press Handstand, Handstand Coach


Handstands are all about bone-stacking. Imagine your body is like a straight stick, your handstand will feel effortless. Therefore finding the alignment in handstand practice is the No. 1 priority. This article will go through the essential components for balancing the handstand. It’s a frequently spoken topic in handstand training but still challenging to put all the necessary pieces together at once. If you are practicing handstands for a while and need to improve your balance skill to the next level, I hope, this article could offer you some useful ideas for your balance skill. 

Missing Pieces - Why You Can't Hold Balance?


A lot of people can get stuck on the wall or stuck not being able to balance a freestanding handstand.

The straight shape is the easiest alignment to hold the balance longer with minimum strengths. The straight shape means your wrists, elbows, shoulders, spine, hips, and toes are on the same line from the side. Monitor your practice and check what your handstands look like because you cannot see yourself in a mirror while you are going upside-down. Find your problem which part of your body is not in a straight line. If your shape looks like….

  • Not Straight:  Banana shape - the arched spine is coming from lacking core activation (not strength!) and shoulder strength to extend your hip joint straight (180-degree angle) by using core engagement. Core muscle doesn’t necessarily be super strong, but you need to consciously use your core to stretch out your body fully by pressing the shoulder girdle against the ground to lift the entire body highest possible to the sky. Moving slowly will help find the sweet spot for both alignment and balance. Once you find the balance spot, remember that position before your come down or fail. It is all about muscle education which you need to give your body repeatedly again and again until becoming the second nature.
  • Underbalanced: The legs and toes are not exactly over your hips, the shape looks slightly bent and tilting from the vertical line. This is coming from your hands and elbows. Check your fingertips are pressing against the ground too much in comparison with the bottom part of your palms. Also, your elbows might be slightly bent and not fully locked, eventually not facing straight forward on your wrist line. Bent elbows stress your elbows a lot and can be a cause of the elbow pain later over time. So lock the elbows strictly, squeeze towards each other to stabilize, push fingertips and palms evenly strong and push tall through the shoulder girdle. You can find a better balance. Just try it out!
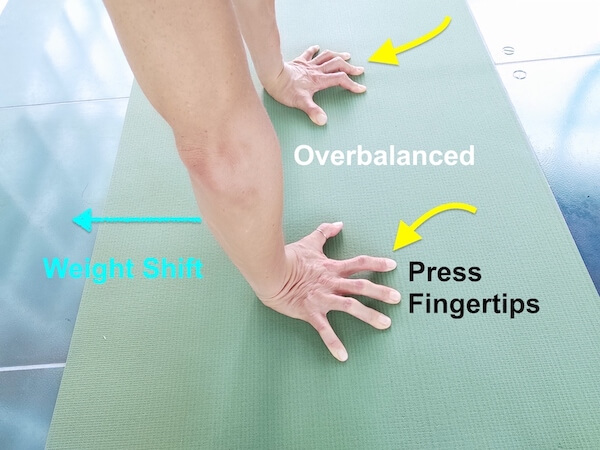
  • Overbalanced:    Constantly falling over and no feeling for the sweet position of balance. If you kick up to handstand, try the following practice:
    Start by positioning your hands on the floor shoulder-width apart. Elbows should be straight with the fingers facing forward. Position the shoulders directly above the hands and apply weight to the arms.

    The kicking leg needs to be straight and ready to lift. The supporting leg can be bent or straight, depending on personal preference and flexibility.
    Move gently and slowly. You can choose your better side, don’t need to be good with both legs for this entry at the beginning. To find the balance position, you practice this split hop.

    From the starting position, the kicking leg lifts as the supporting leg pushes off the floor. When the hips rise over the head you simultaneously open the shoulders to achieve a straight line between the arms and torso.

    When learning this movement, it will be easier to stay in a split before pulling the legs together. Once you can constantly find the balance position with this split hop, then step up to hop with both legs and hop to L-shape hold. Your body can learn the movement pattern more efficiently if you practice step by step. Practice daily, be patient.  The split hop drill is a great tool to learn how to catch the handstand at the top of the kick. There is unfortunately no secret, just repeat, repeat, and repeat to master.
     
    Let’s summerise Split hop drill!
    Place hands on the ground
    Shoulders above the hands
    Elbows extended, facing forward
    Shift weight into the hands with activated fingertips
    Kick with the straight leg, push off the supporting leg
    Move slowly
    Push tall through the shoulder girdle as the hips rise
    Inhale deep to hop until the top of the kick
  • Elbows bent: Unless you have the enormous arm strength, unlocked elbows for handstand is quite a challenge to stay longer time. The best way to ensure the locked elbows, you adjust and fix this before going further up to the handstand. When I started learning handstands at the beginning, I try to adjust the elbows in L-shape and Tuck position, before going to full handstand as it is easier than with straight legs over the head. Then from the halfway, I push further upwards. In this way, I could save my energy for holding and re-balancing.
  • Shoulder vs Scapula elevation: We all tend to lift our shoulders as soon as something is stressful or a lot of tension. Shoulder crunching and scapula elevation are different. Crunching shoulders causes stress in the neck area so that the scapula cannot freely move anymore. Typically the instructors say, that you need to draw the shoulders to the ears. In my opinion, this is a confusing expression and not exactly correct. Sliding scapula upwards towards the ears, at the same time the collarbones are pressing in opposite direction. This opposite force creates the press. It is a little paradoxical here, but try this out. You can lift your shoulder blades upwards while pressing the collarbones downward. By doing so you can feel that the neck has more space. Check the neck area and how it feels. You can feel your neck longer when you do it. That is the exact right move for a handstand.
  • Hand placement too wide/narrow: There is no one size fits everyone for this topic. You need to find your sweet position. Some need a wider position, and the others need a narrower one, depending on shoulder and wrist flexibility. Find the position where your wrists do feel minimum stress when you fail through overbalanced handstand as the wrists will get more flexion and too much land for the wrists. I tend to place my palms just about my shoulder width. The wider position is too much stress for my wrists. But I know some prefer to place the hands much wider and do great handstand performance. Find the happy position that fits you.
  • Fingers: You want to spread your fingers wide. This gives you a slightly wider base than if the fingers were close together. Focusing on gripping the ground is called "Spider Fingers”. The fingertips and the first knuckles of the hands do the main work for hand balancing. If you think about the length of your hand from the end of the palm to the tips of the fingers strive to keep the balance in the middle where the palm goes into the first knuckles of the fingers.
    When Overbalanced, the fingertips need to push harder against the ground, contrary in underbalanced the bottom part of your palms and knuckles need to push harder. Just play a little with a different portion of fingertips, knuckles, and palms. To do this experiment, I recommend spreading both feet a little apart to hold the balance easier. Practicing beautiful handstand shapes and educating your body balance require different drills. So don’t hesitate to look less cool and experiment as much as you can. Practice should look like a mess. That’s what the practice is for. We all fail always in handstand practice. You are not alone.
  • Tightness/Tension: For balancing, you need to focus on body tightness just like a stick.  The core muscle plays also an important role in balancing. It doesn’t mean the core must super strong, it is more about activation of the connection between the core muscle and the hip flexor to ring the front part of your body straight. For this activation, not a lot of core strength is required. To make your whole body tight and keep tension like a stick, the core needs to be able to engage in the upside-down position which is challenging for most practitioners. Pointed toes, active legs, and glutes with core support are important elements for re-balancing as well.
  • Gaze and Head position: Finally, last but not least I can talk about the gazing point. Keep your eyes between both thumbs or wrists, additionally have a closer look at your neck and head. If you have somehow slight tension in your neck area, shift the gaze a little to adjust the most relaxed position for your neck and shoulders. There is very fine-tuning work in the neck position beside the gazing point. If you feel the tension in the neck area gazing between both thumbs, I recommend shifting your gaze further down between the wrists. It took me a little while to find this for myself. Since I changed my gaze point, I can hold handstand better with less struggle or muscle stress. Keeping the head and eyes stationary while you are holding so that the brain is not receiving new information, makes the brain's job easier.
How to fix underbalanced handsatnd
How to fix overbalance in handstand

Recommended Drills:

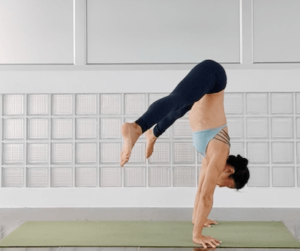
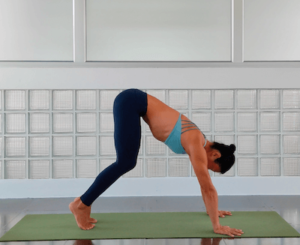
Straddle to Tuck Combo Halfway:

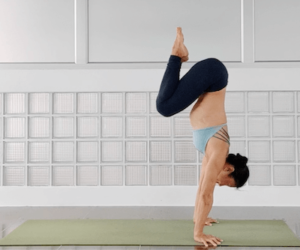
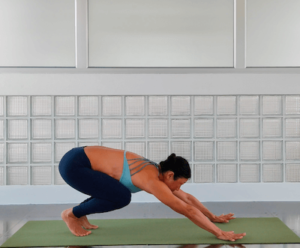
Tuck Hop Hold

I hope, this article could offer you some useful tricks for your balance issue.  Enjoy your handstand journey and happy handstand practice!                                               


Please feel free to comment with any questions or feedback on the blog. I am happy to hear from you.

For an absolute beginner to the handstand, I have an ultimate beginner’s press handstand online program. Check “Home” in Menu above or click the logo on the top.

Yasuko

About the author

My name is Yasuko and I'm passionate about handstands, yoga movement and flexibility.  I immersed myself in research a lot to inspire myself & experiment for physical development. This has led to the person I am today.

Leave a Reply

Your email address will not be published. Required fields are marked

{"email":"Email address invalid","url":"Website address invalid","required":"Required field missing"}